


How to Add the Moon and Stars to Your Photos in Lightroom
Filed under:
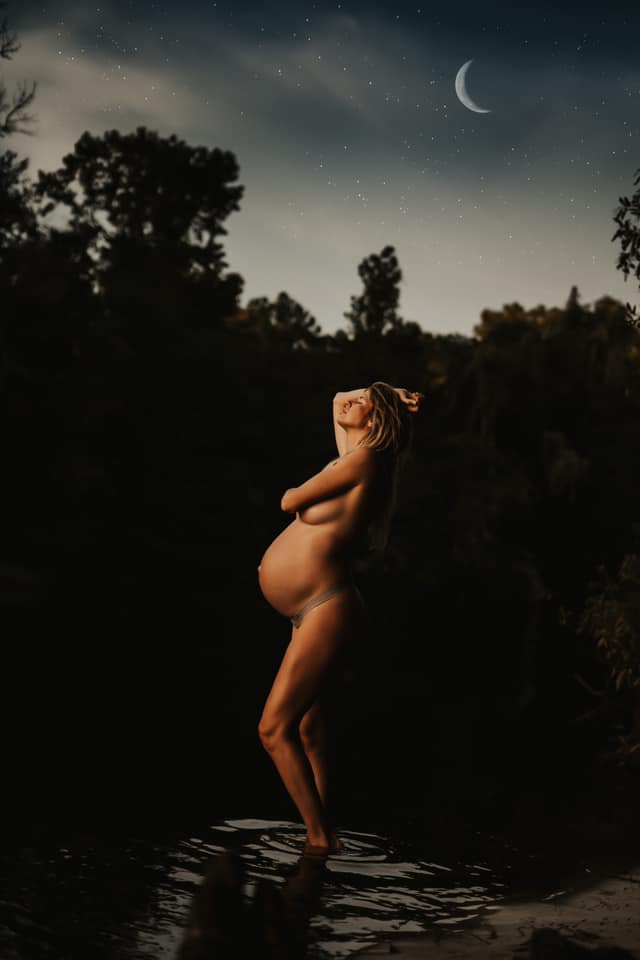
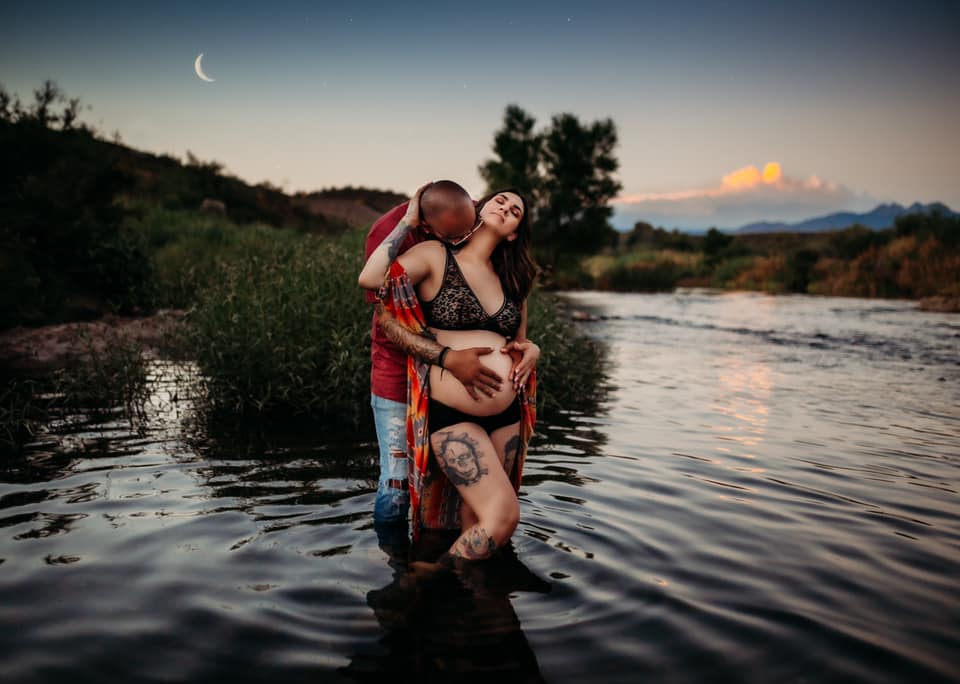
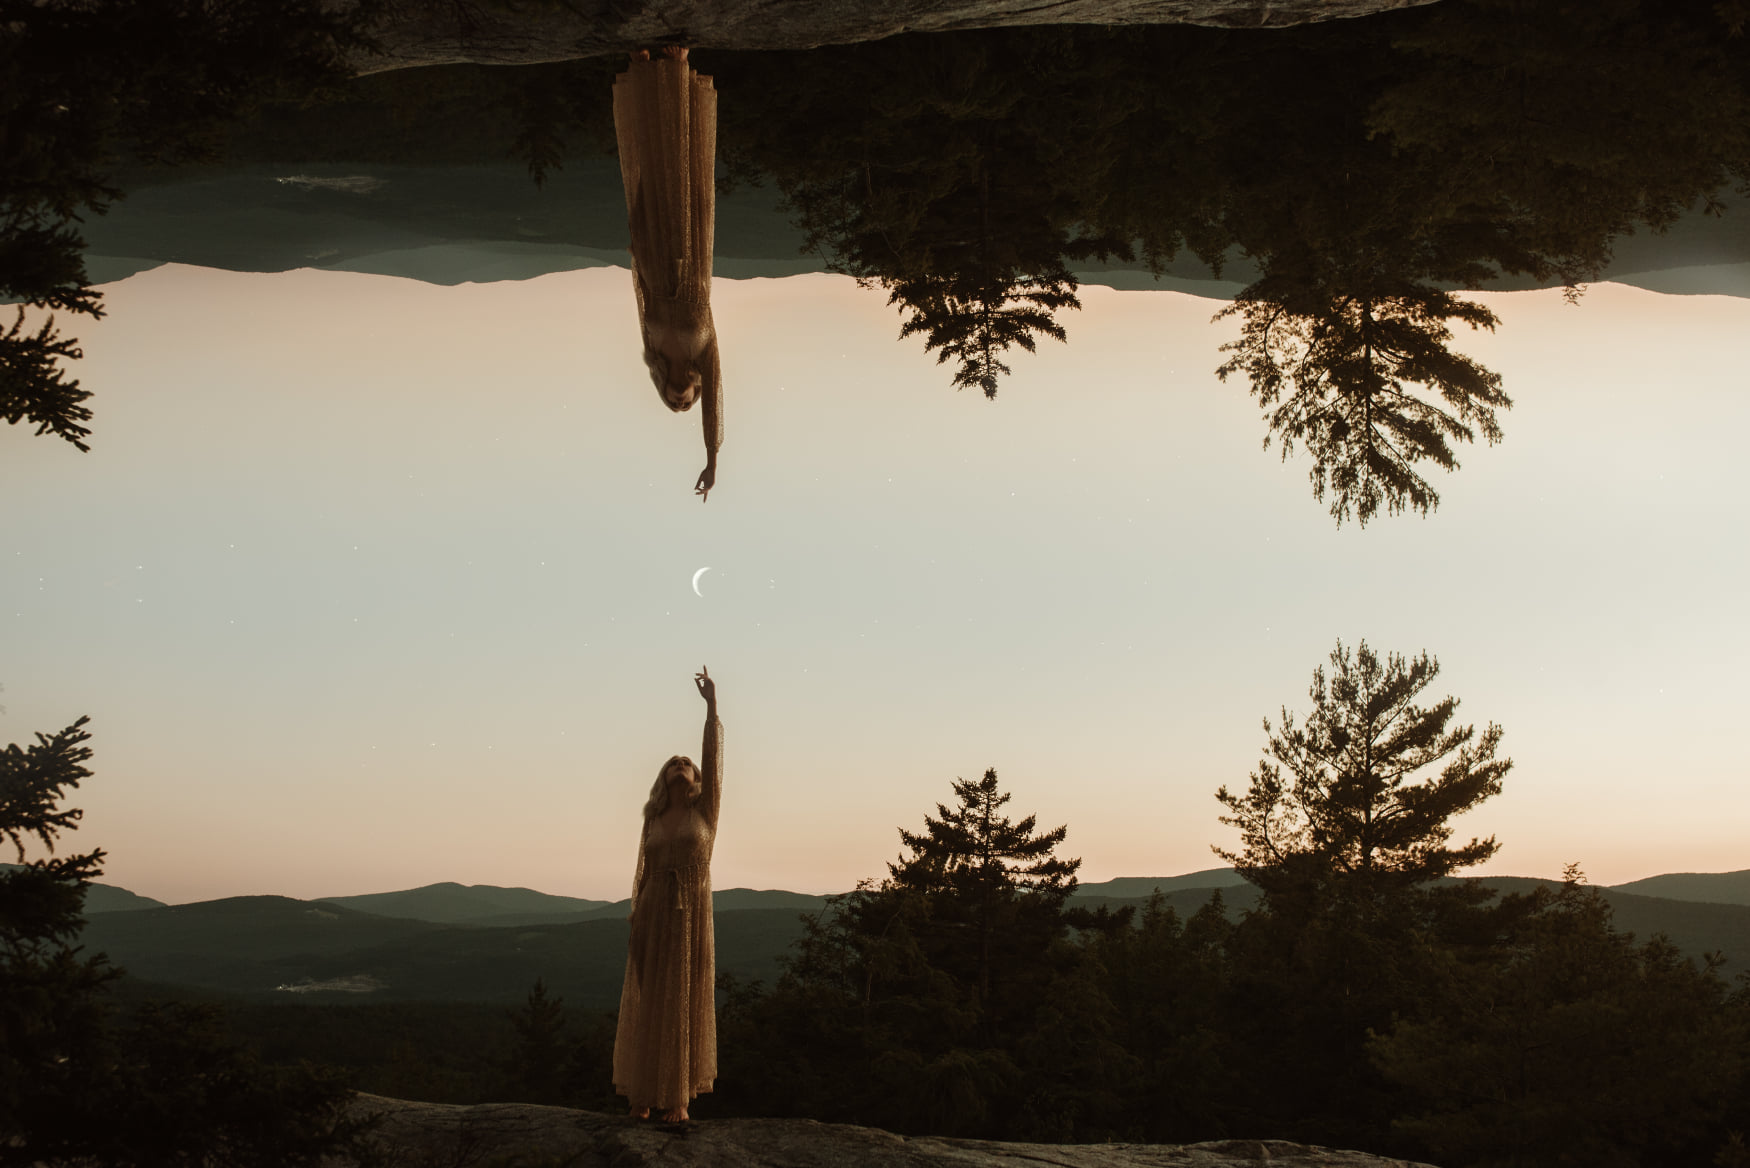
I am so over boring skies.
Grab your Moon & Star Celestial Brushes here.
When I show up to a shoot, I hate seeing an empty sky! It’s dull and lacks drama. While there is special magic to be found in the intimate connection between you and your subject no matter the location, having a stunning backdrop adds an element of artistic flare that I’m forever obsessed with.
That’s why I created these Celestial Brushes to add the moon and stars to any photo I want in just one click. It’s become a passion project to add dynamic and dramatic skies with ease right in Lightroom. Once I discovered how, I couldn’t keep it to myself! I had to make amazing night skies available to my entire community so I teamed up with Meridian Presets to make it happen.
These magical images capture attention and leave the viewer in awe. “How did they do that?” is the question that pops up the most when people see the photographs in the wild. It adds a mysterious wonder that’ll leave your future clients excited to see what you create for them.
In addition to the questions that these dreamy effects create in potential clients, when I’ve shared my nighttime shots, I’ve been met with tons of questions from you – our amazing community of photographers! In this blog, I’m going to break down the questions I most frequently get and give you all the tips for adding personality to your skies!
The Basics:
Why are Lightroom Brushes better than Photoshop edits?
Of course, you can totally add these elements in Photoshop, but it takes so much time. It’s a pain to do – you’ll spend hours watching tutorials and fine tuning the details.
I’m all about working smarter instead of harder, so creating a Lightroom brush I could add in one click was essential. Any element I can add in one click in Lightroom and can add to every single image is exactly what I want. Now you can batch edit your night skies! You don’t have to pick between a dramatic edit and consistency. You can have both. This is what I teach in my Embracing the Storm course, but it’s also foundational to my presets and brushes. I’m here to eliminate hassle and help you grow.
Do my photos need to be taken at night?
- You can see the moon at any time, but especially for blue hour it adds something extra.
Tips + Tricks
Study the Night Sky.
This is your homework: go outside on a clear night to a location away from bright city lights. Look up at the sky without your camera and just observe. What do you notice? Take notes. Pay attention.
Change the color temperature of the moon.
By warming up your moon, you can make it glow in a way that feels more realistic. It’s a simple change that can make a huge difference.
Check out the Dramatic Skies Module of Embracing The Storm.
What other photographers are saying + creating:
These brushes were so easy to use and so fun! Absolutely recommend!! – Samantha Simpkins
Caved and bought the brushes. I’m dead ???? – Tessa Rae
In love with Twyla’s moon and stars overlays!!!! Just adds that extra WOWZA to my images!! – Celia Bell
Make the skies look DOPE and consistent. I made you a tutorial!! Watch below to see how I use the brushes in my images and use the plugin to rotate and resize while layering all the elements together.


